
I use Adobe Illustrator for turning my designs into seamless tiles. I would use Adobe Illustrator to cook my food and vacuum my floors if I could figure out how. (I bet there's a tutorial out there...) The Spoonflower folks have also recommended several free graphics programs that may do most or all of the same things I am going to describe here.
Basically, a seamless pattern relies on the same principles that MC Escher used to create his stunning tesselations: if you take something away from one edge, you have to add it back to the opposite edge. So, here's a simple starting tile for a Christmas tree pattern:

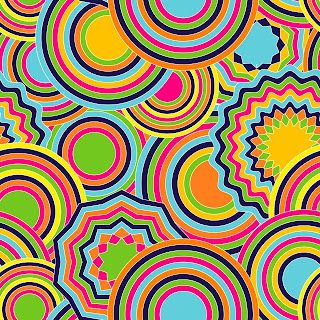
But we're getting ahead of ourselves. There may be a speedy way to create seamless patterns, but I haven't found it. I usually decide how big I want the pattern repeat to be BEFORE I have all the designs put together--otherwise, with a set of complex shapes like the concentric circles (below), it's hard for me to backtrack to figure out what the repeat should be (does that make sense?) unless I just make it bigger than what I already have, which means there's a lot more space to fill and a lot more designing to do. And most of the time, when I choose the size, it is in either half or whole increments of inches or in multiples of 50 or 100 pixels. More about this later.
Back to our tile. You see that the Christmas tree on the top over-hangs the edge of the square exactly as much as the tree on the bottom invades the square. And although I have been known to eyeball alignment correctly down to the pixel (I claim to have a laser level built into my brain), I don't leave anything to chance, because even the slightest mis-alignment can lead to yucky seams running through your work.
There are a couple of ways in Illustrator to ensure that the alignment of any objects that extend past the tile shape's borders is perfect. You can use the "Transform" live effect to make a copy of your design element and move it a set distance. This is where having predetermined a nice round number for the size of your tile can make your life easier. If you have a tree on one edge of a 2-inch square and you need to make its twin on the opposite edge, you would just enter "2 in" in the distance box and you're good to go.
That's probably the better way to go--there are whole tutorials about using the Transform effect to speed up your work. Here's one I highly recommend.
Still, that's not how I do it. Once I decide on the size of my tile, lets say 400 pt, I go into the Preferences panel, to General. In the Keyboard Increment option, I put "400 pt." Then I can draw a shape that overhangs one edge, select the shape, click "option-downarrow" (or alt-downarrow for you Windows people), and there's a perfect copy of my shape 400 pts from where it started. Snazzy, no?
 I don't think we'll be winning any awards for this tile, but you get the picture, yes?
When I'm working on a more complicated pattern, once I have decided how big the repeat will be, I start working in an organic way, placing things where I think they'll look nice, not worrying about the edges of my square. Then I go back and make sure that each overhanging shape has a twin on the opposite edge. This can get complicated when you have a lot of shapes layering over one another as in this loony design:
Finally, a couple of tips:
- Did you know that you can make a repeating pattern tile in Illustrator out of a rectangle instead of a square? Makes for a nice change of pace sometimes.
- Stand back from your pattern and squint. If all you really see are imaginary square lines connecting your shapes, you probably have more work to do.
- Consider designing your patterns for a half-brick or half-step repeat--in these, the alignment of the shapes along the x- and y-axis, respectively is off by 50% of the total size of the shape. So that means that your repeats are more like diamonds than squares.
- Consider, without allowing yourself to become obsessed or depressed by the fact that there are, in fact, as many as 17 (SEVENTEEN!) symmetry types upon which you can base a repeating pattern. For most of these, Illustrator's handy pattern swatch will not do the trick without some manual manipulations on your part (you will need to rely on the Transform Effect, which can handle x- and y-axis reflections and rotations, too). There is also a pattern plugin available for Illustrator that can generate all these types of symmetry. But I think that takes all the fun out.
*Also see Rachel Galloway's very detailed posts on designing fabric for Spoonflower at her Mamma Made blog.


1 comment:
This was an awesome tutorial!!!! Thanks so much for taking the time to put this together!
Post a Comment